September 1, 2022
Oh, hey! Thanks for stopping by to check out my latest post!

First off, I want to acknowledge that I am not the originator of this idea. Fabric chips have been made a thousand times over by many different and talented creatives. Each tutorial is unique and adds to the wonderful world of inspiration. That’s my ultimate goal here. And also to have lots of fun playing with tiny pieces of fabric.
Secondly, none of the links included are affiliate links. I just like the products!
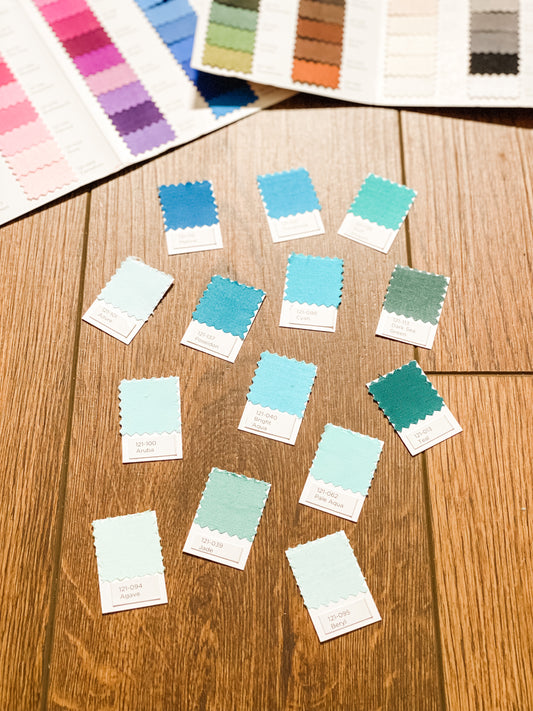
My measurements are made specifically for Paintbrush Studio’s Painter’s Palette Solids fabric swatches. Their swatches are 1” square, so just adjust your cuts to the size of your swatches. The rest of the instructions apply to all sizes.

MATERIALS
Fabric Color Card from your favorite fabric manufacturer
Heavy card stock
Glue stick
Paper cutter*
*I HIGHLY recommend investing in a paper cutter. I use mine all the time for different things, both crafty and non-crafty. It’s just good to have one on hand. As a bonus, you won’t have to use a rotary blade for “paper only.”
Check out THIS paper cutter…less than $30!
STEP 1
Using your paper cutter:
Cut your card stock into 1.5” strips.
Sub-cut these strips into 1 x 1.5” rectangles.


You can make quick work of this by layering 3 sheets of card stock together and layering 3 strips together for the cuts.
Cut as many rectangles as you need for each fabric swatch. Set aside.
STEP 2
Cut your color card apart, keeping fabric names next to the coordinating fabric swatch.


STEP 3
Carefully remove fabric swatches from the color card, making sure to keep them in the right order.

STEP 4
Using the glue stick, spread glue along the top half of one of the card stock rectangles.

STEP 5
Attach fabric swatch to glued area, pressing with your fingers to make sure the glue adheres.

STEP 6
Trim the fabric name from the color card using the paper cutter.

STEP 7
Run the trimmed fabric name along the top of the glue stick.

STEP 8
Attach the fabric name below the fabric swatch. And you’re done! Continue with remaining fabric swatches.


Well, that was fun! Now we can create gorgeous color combinations for our next project! Thank you so much for sharing this time with me. Let’s hang out again soon.
Until then, make something magical.